KIEI-451: Introduction to Software Development
Javascript & the Browser - Part 2
Javascript Events
As a user interacts with a webpage, their actions are quietly being monitored. Kind of creepy, right?! On its own, this monitoring is harmless - it only occurs locally in the user's browser and is immediately forgotten.
But it servers an important purpose. Each user action - each hover, click, scroll, and change - gets announced as an event. And if we listen for and hear some of those events, our code can react. Combine these events with DOM manipulation and we get modern interactive web applications.
Event Types
Below are some common events we'll be using, but there are many more to choose from.
| Event | Description |
|---|---|
| click | A mouse pointer clicks on an html element (commonly a button or link) |
| keyup | Any key on the keyboard is released |
| mouseover | A mouse pointer moves over and hovers on an html element |
| submit | An html form is submitted |
Event Listening & Handling
There are 2 components of event-driven javascript. The first is the event listener - a bit of code that identifies which node in your html will trigger the event and the type of event. Just as it sounds, its job is to listen to a node and wait for a specific event to fire. The second is the event handler - a function that will run when the event is heard (i.e. fires). Again, just as it sounds, its job is to handle the event by reacting to it with some defined behavior.
There are several ways to define listeners and handlers, but for now we use the built-in DOM function addEventListener(). The function expects 2 parameters - the name of an event type and a function (anonymous or defined).
Let's add a listener to a button that will trigger an alert (a basic popup box and message which must be dismissed by the user).
  <!-- HTML -->

  <button class="alert-button">
    Click me!
  </button>
  // Javascript

  let button = document.querySelector('.alert-button')
  button.addEventListener('click', async function(event) {
    alert('the button was clicked!')
  })
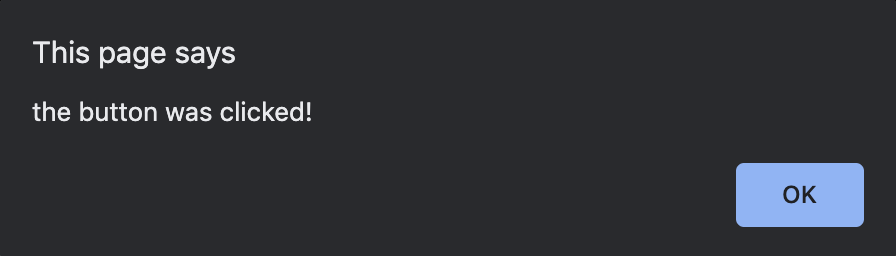
The html is a simple <button> that says "Click me!". In the javascript, we first find the correct node with class "alert-button". Then addEventListener() adds an event listener to that element, waiting for aclick event. When that event occurs, the alert() code inside the anonymouse function runs.
Another example. This time we'll handle a keyup event on a form input. We'll also use a defined function instead of anonymous.
  <!-- HTML -->

  <form>
    <label for="first_name">First Name</label>
    <input type="text" name="first_name" id="first_name">
  </form>

  <div id="greet"></div>
  // Javascript

  let input = document.querySelector('#first_name')

  input.addEventListener('keyup', async function(event) {
    let first_name = input.value

    if (first_name.length > 0) {
      document.querySelector('#greet').innerHTML = `Hello, ${first_name}!`
    } else {
      document.querySelector('#greet').innerHTML = ""
    }
  })

The html is a basic form with a label and input. The input has an id of first_name. And below the form, there is an empty<div> with an id ofgreet.
In the javascript, we first find the correct node with id "first_name". Now let's look at the greet() function we've written.
Form inputs have a special attribute, value, which we're using to read what the user has typed.
let first_name = input.value
If there is a value (i.e. its length has at least 1 character), we replace the div's nested html with a constructed string. Otherwise (i.e. if the input is empty), we clear the div's nested html by replacing it with an empty string.
  if (first_name.length > 0) {
    document.querySelector('#greet').innerHTML = `Hello, ${first_name}!`
  } else {
    document.querySelector('#greet').innerHTML = ""
  }
Finally, we add the event listener. In this scenario, we want our javascript code to wait and listen for a keyup event to fire from our input element. On each occurrence of that event, our code will run the greet() function.
input.addEventListener('keyup', greet)
Note that we don't want greet() to run immediately when our code runs. We want it to wait to run when the event fires. So instead of calling greet(), we only reference the function's name (greet without the parentheses `()`) when it's passed as a parameter of addEventListener(). We refer to this type of function as a callback.
Callback Functions
A callback is a function that will be executed in the future only after another function has finished — hence the name callback, as in it will be "called back" later by the originating function.
Why does this matter? Sometimes our code will run consecutively, or synchronously, from the first to last line. In other words, some of our operations are started only after the preceding ones have completed.
But because javascript is event-driven, there are many times when our code has to wait for an event to occur before it executes. In those situations, we can’t just call one function after another and hope they execute in the right order. Some events will take longer than others to execute and some may never occur. Or, as we'll see in the next section, when we request data from external sources, such as an external API, we don’t always know when the data respone will be ready. In these instances some code needs to wait for the response, but we want other code to continue on.
These situations are where callback functions come in handy. Using callbacks, we can allow some code to execute asynchronously.
To demonstrate this, let's try to write our code above without a callback.
  input.addEventListener('keyup')
  greet()
This code is broken and will raise an error because addEventListener() is missing its second parameter. But let's pretend that it works. Hypothetically, what would happen?
The keyup listener would be added to the <input>. Then the greet() function would run. It checks the input's value which, at that moment in time is blank. So, effectively nothing happens (the function will add an empty string to the div). At some unknown future time, the user types a value into the input, but our greet function has already executed. Nothing further happens.
This admittedly contrived example is why we use callback functions - when we want to run a function chronologically even though we don't know or can't guarantee the chronology of events.
Let's look at a working example to understand how callbacks are used.
  function doTask(name, milliseconds) {
    console.log(`starting ${name}`)
    console.log(`finished ${name} after ${milliseconds} milliseconds`)
  }

  doTask('first task', 1000)
  doTask('second task', 1000)
finished first task after 1000 milliseconds
starting second task
finished second task after 1000 milliseconds
In the doTask() function, our code simply logs that a task is starting and then logs that it finished. It accepts 2 parameters, a task name and a time in milliseconds (we'll see why milliseconds in just a moment). Nothing surprising here. In the console log, we see the expected order of logs, "first task" starting and finished, then "second task" starting and finished.
You probably noticed that the tasks don't really take 1000 milliseconds to be "finished". Let's fix that. We'll use a built-in function setTimeout() which executes code only after a designated period of time has elapsed. The function expects 2 parameters, a callback function, and the time to wait in milliseconds. And to make things just a bit more obvious, we'll make the first task take 3000 milliseconds (i.e. 3 seconds) to complete.
  function doTask(name, milliseconds) {
    console.log(`starting ${name}`)

    setTimeout(function() {
      console.log(`finished ${name} after ${milliseconds} milliseconds`)
    }, milliseconds)
  }

  doTask('first task', 3000)
  doTask('second task', 1000)
starting second task
finished second task after 1000 milliseconds
finished first task after 3000 milliseconds
Interesting! Now our code is executing in an unexpected order. The "first task" starts and then the "second task" starts. We don't see it, but 2 timers also start (when setTimeout() is called in each function call). When the "second task" timer hits 1 second, the "second task" is finished. And lastly, when the "first task" timer hits 3 seconds, the "first task" is finished.
Callback functions execute asynchronously. Meaning when our code reaches a callback function, it recognizes it as a callback and then moves on. In the above example, that's how the "second task" starts before the "first task" ends. The callback function in setTimeout() of the "first task" is recognized but executes asynchronously while, at the same time, the code moves on to log that the "second task" is starting. And then eventually, the callbacks in both tasks complete when they're supposed to but irrespective of each other or any other code.
Before we move on, let's put this together with event listeners.
We'll write some html that has 3 buttons, each with a click event listener, all children of a surrounding div element. The first button will change the background color of the div to purple. The second button will change it to black. And the third will change it to white. For brevity, we'll ignore any other css, but there is some css used to style the buttons as they appear.
  <!-- HTML -->

  <div>
    <div class="main">
      <button class="button-purple">
        Go Wildcats!
      </button>
      <button class="button-black">
        Go Wildcats!
      </button>
      <button class="button-white">
        Go Wildcats!
      </button>
    </div>

    <ol class="clicked-list"></ol>
  </div>
  // Javascript

  function changeBackground(color) {
    setTimeout(function() {
      document.querySelector('.main').style.backgroundColor = color
    }, 8000)

    let list = document.querySelector('.clicked-list')
    list.insertAdjacentHTML('beforeend', `<li>${color}</li>`)
  }

  function purpleBackground() { changeBackground('purple') }
  function blackBackground() { changeBackground('black') }
  function whiteBackground() { changeBackground('white') }

  document.querySelector('.button-purple').addEventListener('click', purpleBackground)
  document.querySelector('.button-black').addEventListener('click', blackBackground)
  document.querySelector('.button-white').addEventListener('click', whiteBackground)

The html on the left should be self-explanatory, but let's breakdown the javascript on the right.
We have a function changeBackground() that expects a single parameter, a string of a css color name.
First, we're modifying the background color. We're using the setTimeout() function with an 8 second delay to demonstrate asynchronous behavior - the user can continue to click without waiting for earlier events to finish executing. The anonymous callback function handles updating the background color once time has elapsed.
  setTimeout(function() {
    document.querySelector('.main').style.backgroundColor = color
  }, 8000)
This is the first time we're seeing a node's style attribute. It's another object with its own properties, one of which is backgroundColor. Re-assigning its value updates the node's background-color style.
The next 2 lines of the function are finding the <ol> element and inserting an <li> element with the name of the color.
let list = document.querySelector('.clicked-list')
list.insertAdjacentHTML('beforeend', `${color} `)
Note that this code runs even though the background color has not yet changed. Normally code executes from top to bottom in order. But this is a good example of how a callback function executes asynchronously on its own time.
We're intentionally using insertAdjacentHTML() instead of assigning the innerHTML attribute because we want to add to this list on each click and not replace it entirely.
The last step is to add the event listeners and handlers. To make the code easier to read, we can write 3 new functions for each color change and use those as the handlers. We then find each button, call its addEventListener() function, pass it the click event and the appropriate callback function.
  function purpleBackground() { changeBackground('purple') }
  document.querySelector('.button-purple').addEventListener('click', purpleBackground)
As a user interacts with this application, any number of click events are firing that will be handled asynchronously. Although our code is explicitly forcing an 8-second delay, in a real application we often don't know how long any event will need before executing. Callback functions make it possible to handle this uncertainty without freezing the user experience. Users can continue interacting without any down time.
You may be wondering if there are any circumstances when we need to wait for an asynchronous function to finish before some other behavior begins. The answer is yes, occassionally, and we'll learn about that next when we start talking to APIs.